
This package is developed and mantained by the Chi2Labs team.
Inspired on an initial contribution by Adi Sarid.
This package is not provided nor endorsed by Amazon. Use it at your own risk.
You can install from CRAN with:
Or from github with:
You need to have:
If you do not have experience with Amazon Cognito, It is recommended to read the official documentation: Amazon Cognito
When a user accesses to your Shiny application with CognitoR, the user is redirected to your configured url in Amazon Cognito, there if user is not logged in, a login page will appear.
If the user is already logged or successful authentication is accomplished , the user is redirected back to your Shiny App with a code/token (depending of your configuration) in the url.
If the app is loaded with a code will get a token via oauth (this code can be used only once). If the app already has the token (via url or received it using the code) it will check authorization with Amazon Cognito via an OAUTH request using the token. A valid authorization will allow the Shiny app lo load, the user will be redirected back to the login page.
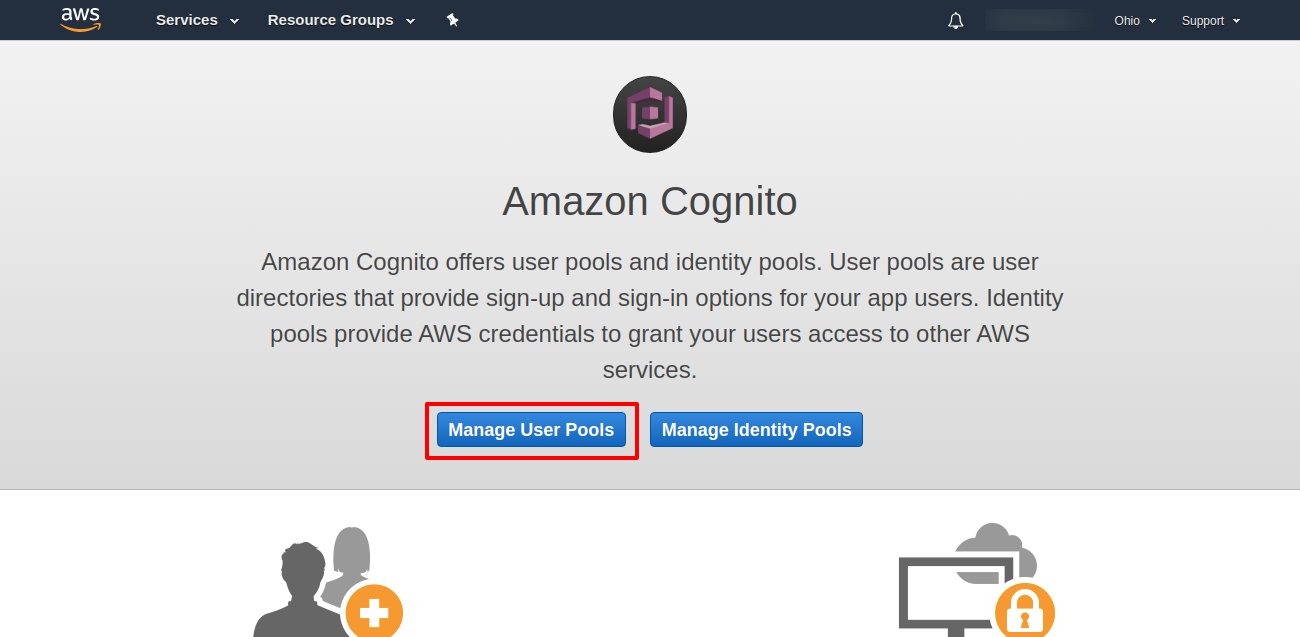
Once you have logged with your Amazon AWS account, go to “Cognito” service and click on “Manage User Pools”.
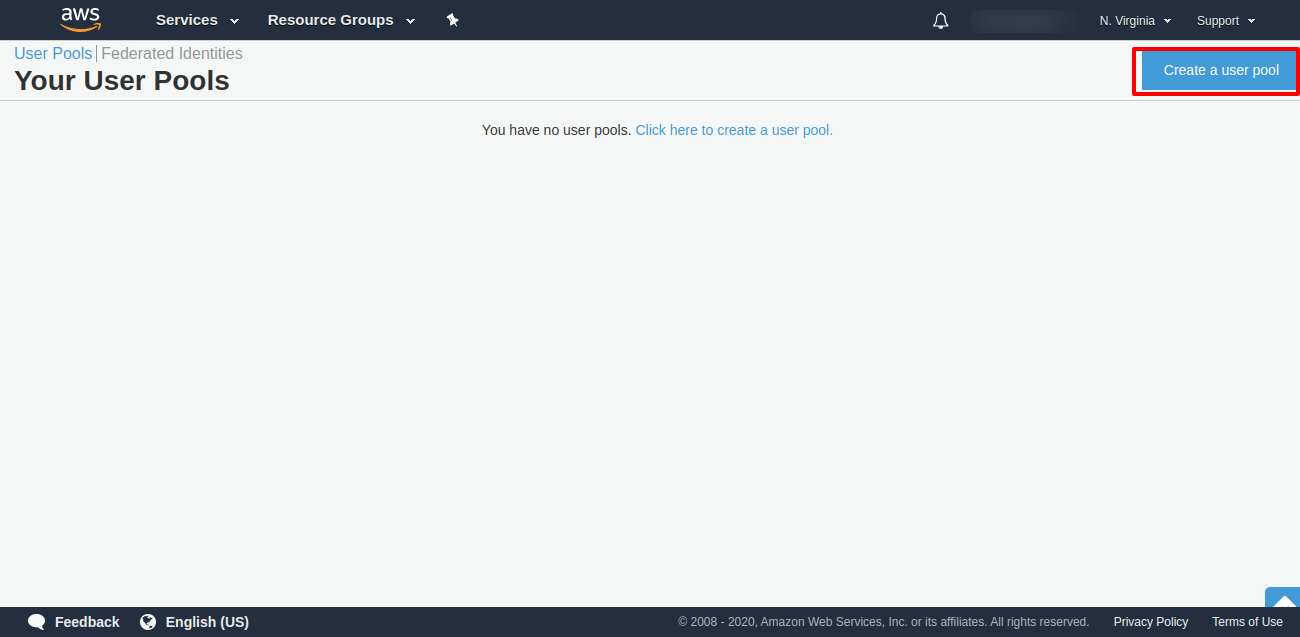
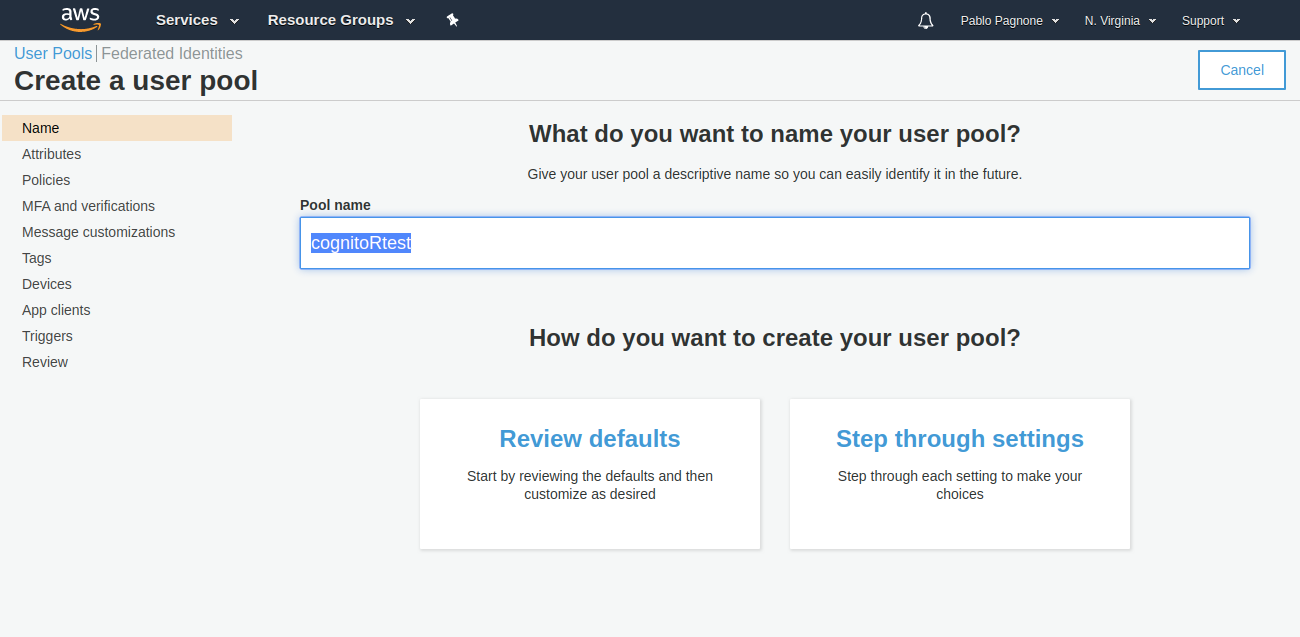
Name your user pool:
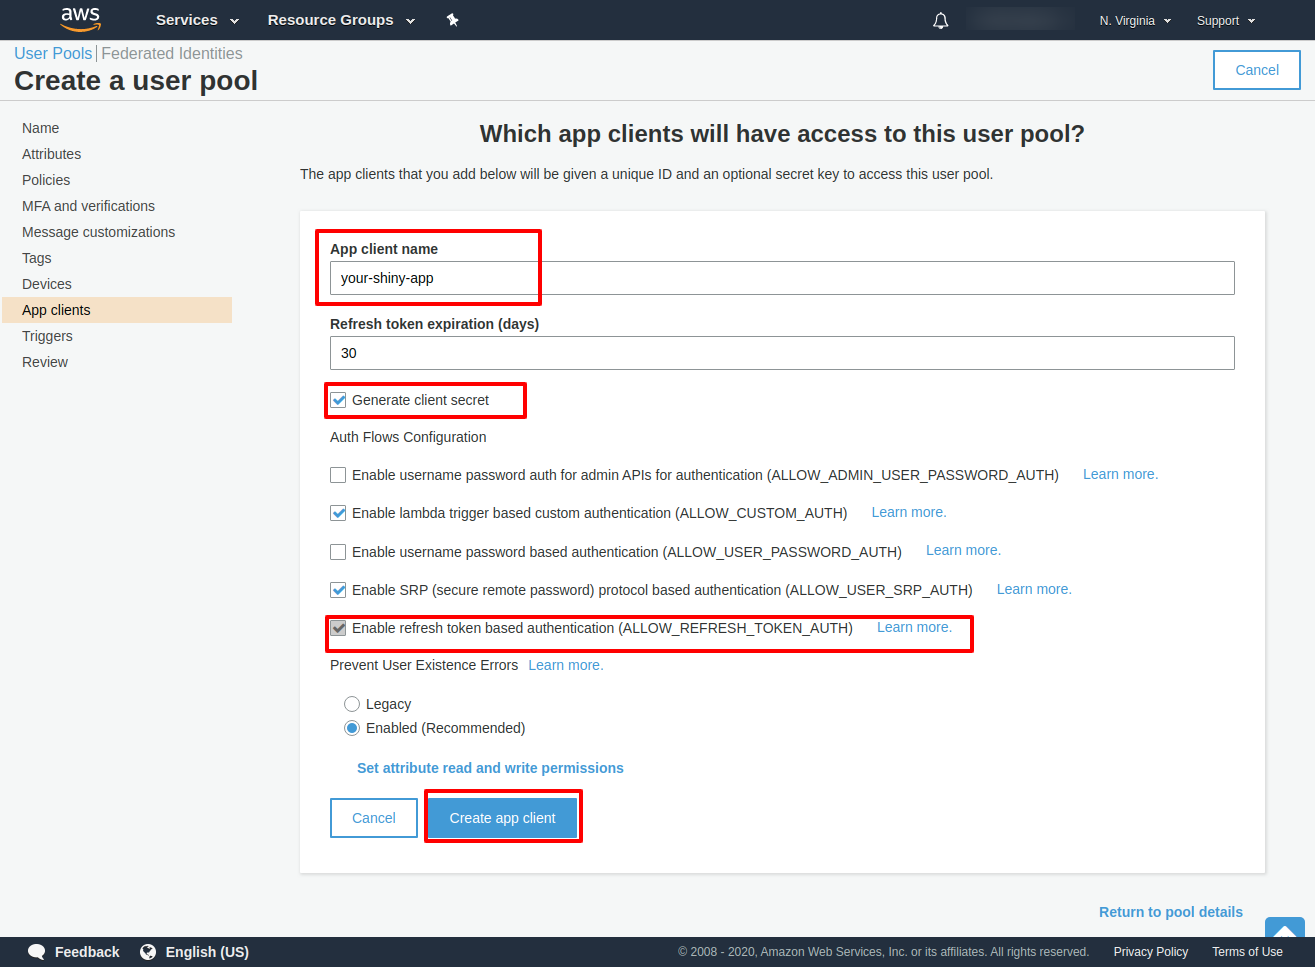
Create a client application (Application that will work with this user pool):
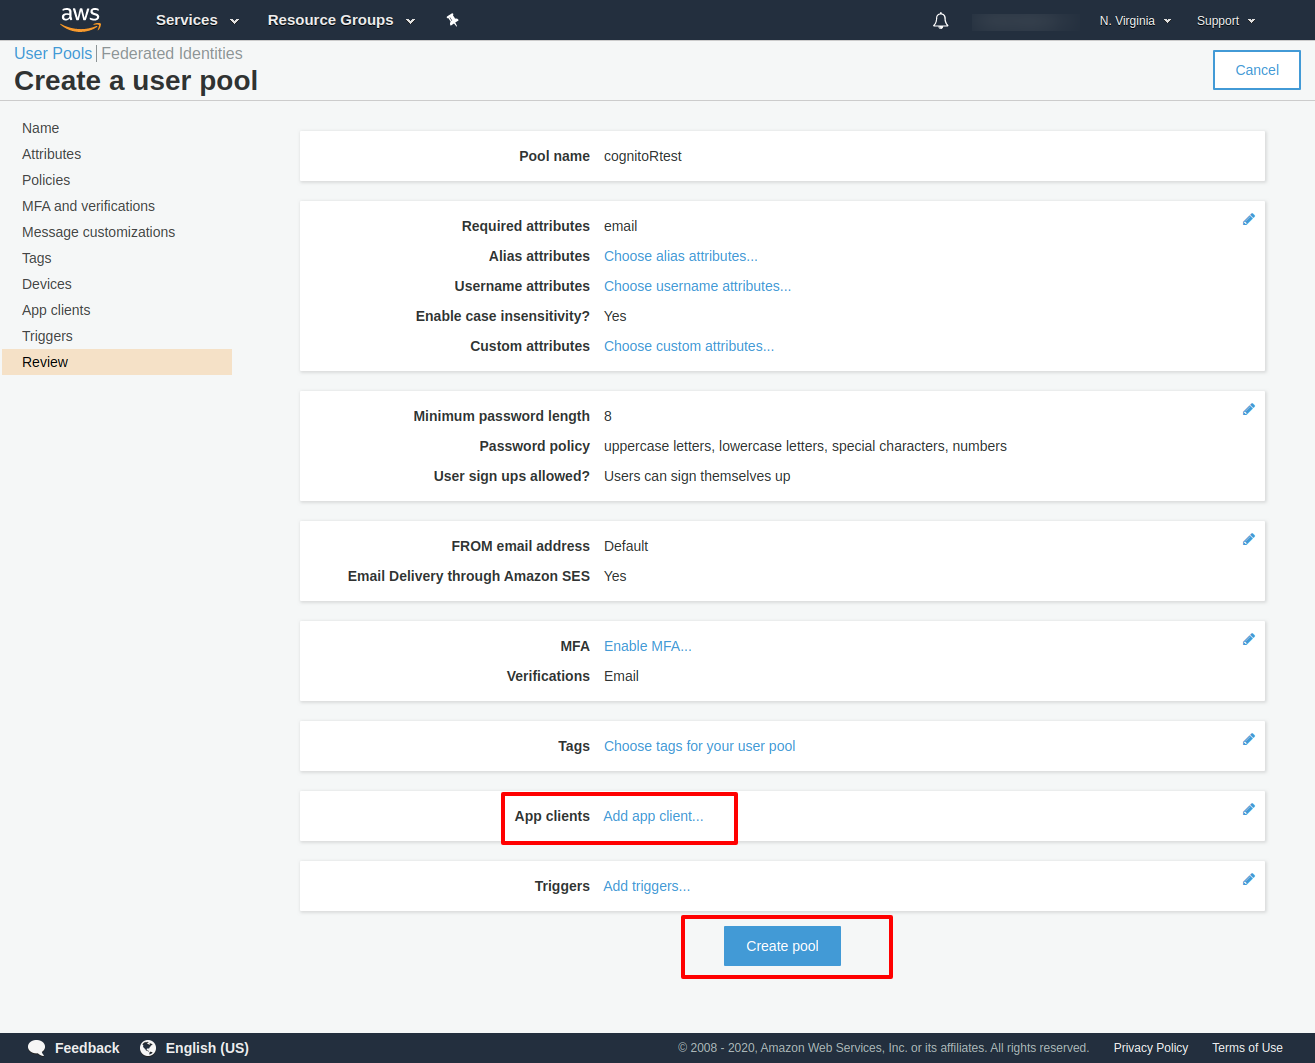
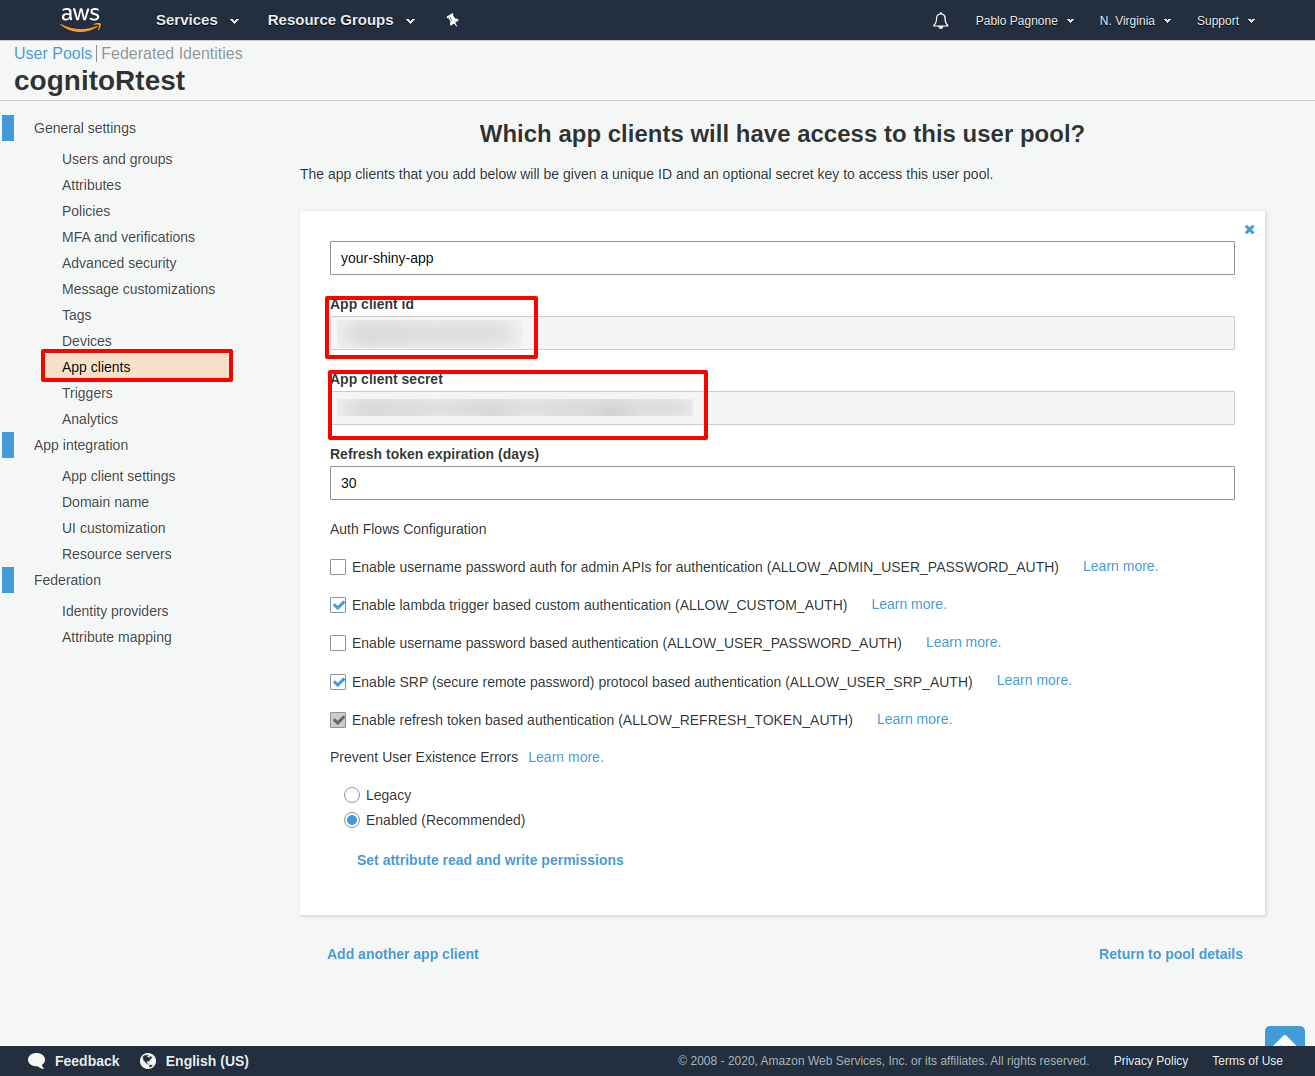
This will generate the client id and the client secret you will need to configure your shinyapp.
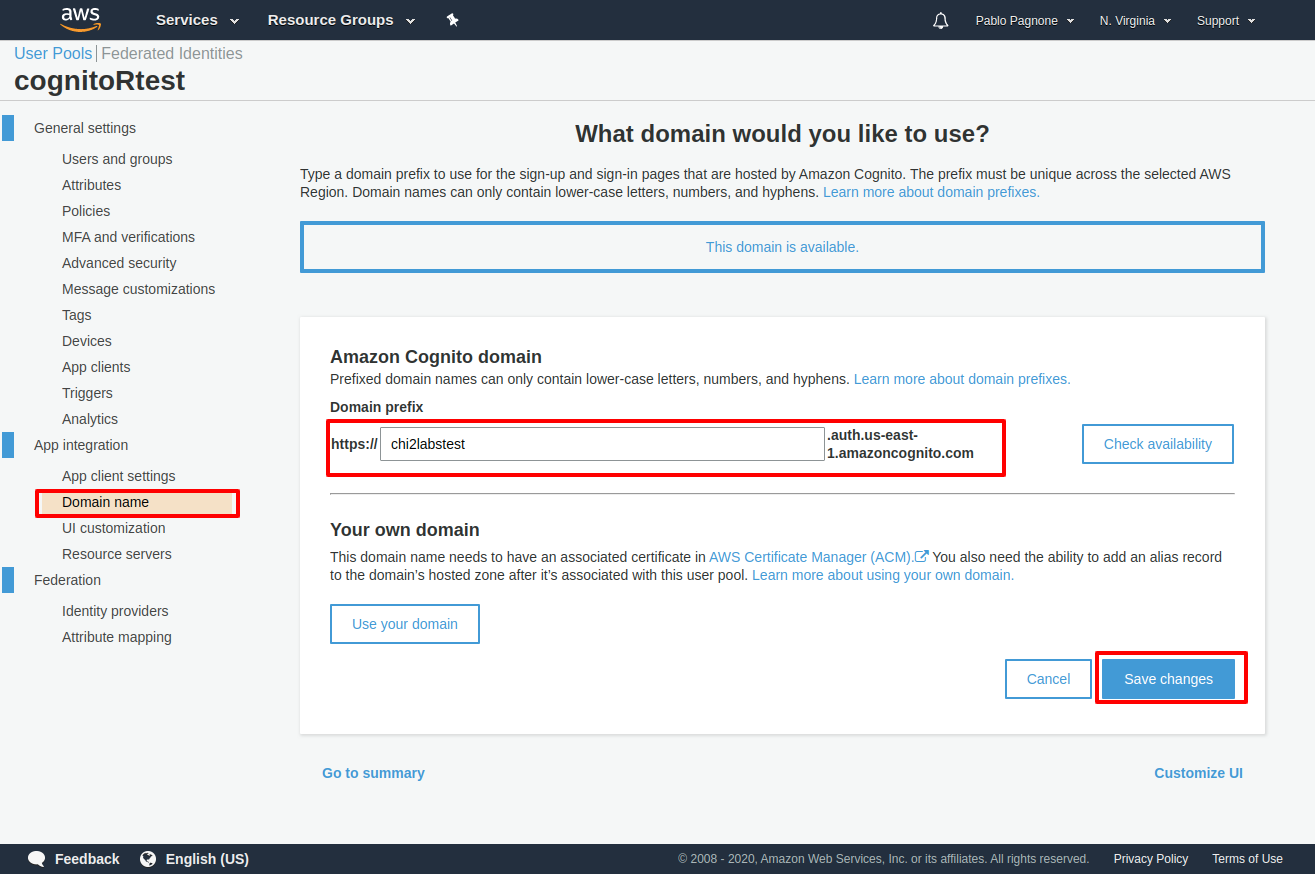
Go to App Integration -> Domain Name, to set the url for login form, you can use a Amazon subdomain or use your own domain.
Also remember the url for your configuration.
Go to App Integration -> App Client Settings and you must:
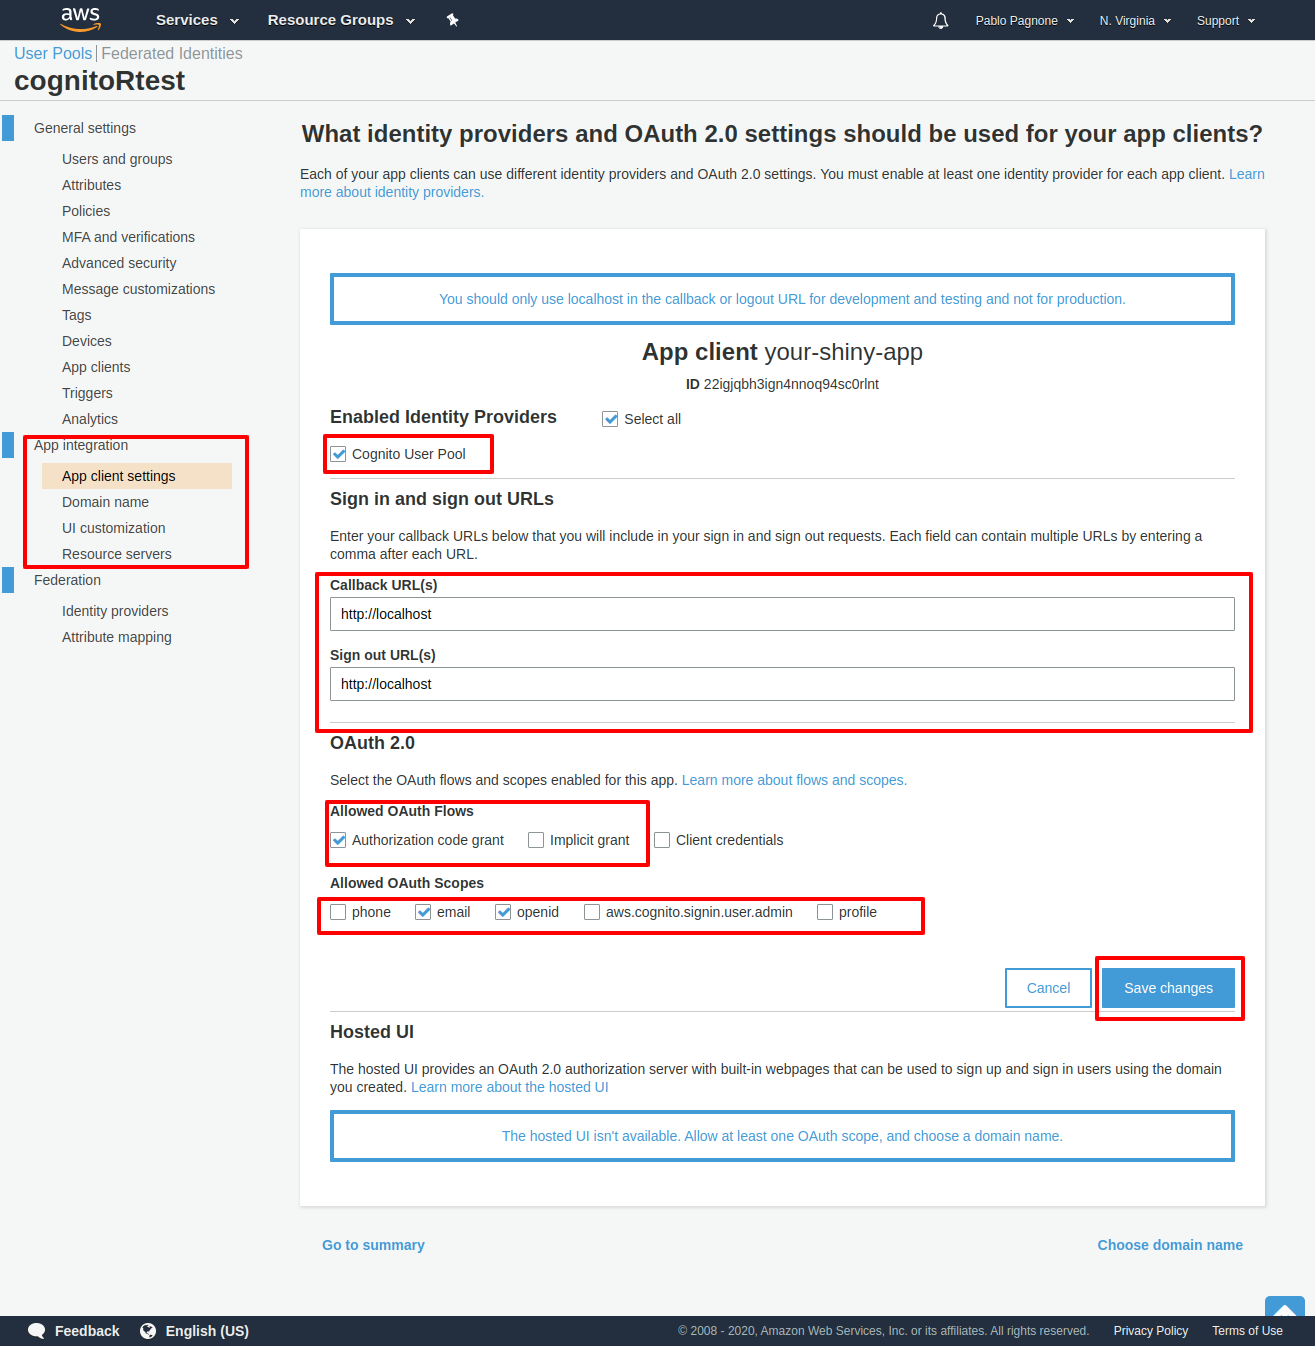
Your basic configuration in Amazon Cognito is ready.
This package requires that you have a configuration file (“config.yml”) in your application folder with the following structure:
Example:
default:
  cognito:
    group_id: ""
    group_name: "YOUR_POOL_NAME"
    oauth_flow: "code"
    base_cognito_url: "https://your_domain.auth.us-east-1.amazoncognito.com"
    app_client_id: "YOUR_CLIENT_ID"
    app_client_secret: "YOUR_SECRET_ID"
    redirect_uri: "YOUR_APP_URL"
redirect_uri_logout: "YOUR_APP_URL"An example app can be found in inst/examples/simple-login-app.R.
The package has two main functions cognito_ui() and cognito_server(). cognito_ui() loads required UI for Cognito Module. cognito_server() which takes care of the logic and interaction with Cognito API. This method also returns reactive elements for:
The example mentioned above includes the use of the Logout module (logout_ui() and logout_server()) which provide a “logout” button interacting with the reactive “isLogged” returned from Cognito Module to show the button and with the logout callback when button is pressed.
You will be redirect to Cognito Login Form , there you can create your account and log in.
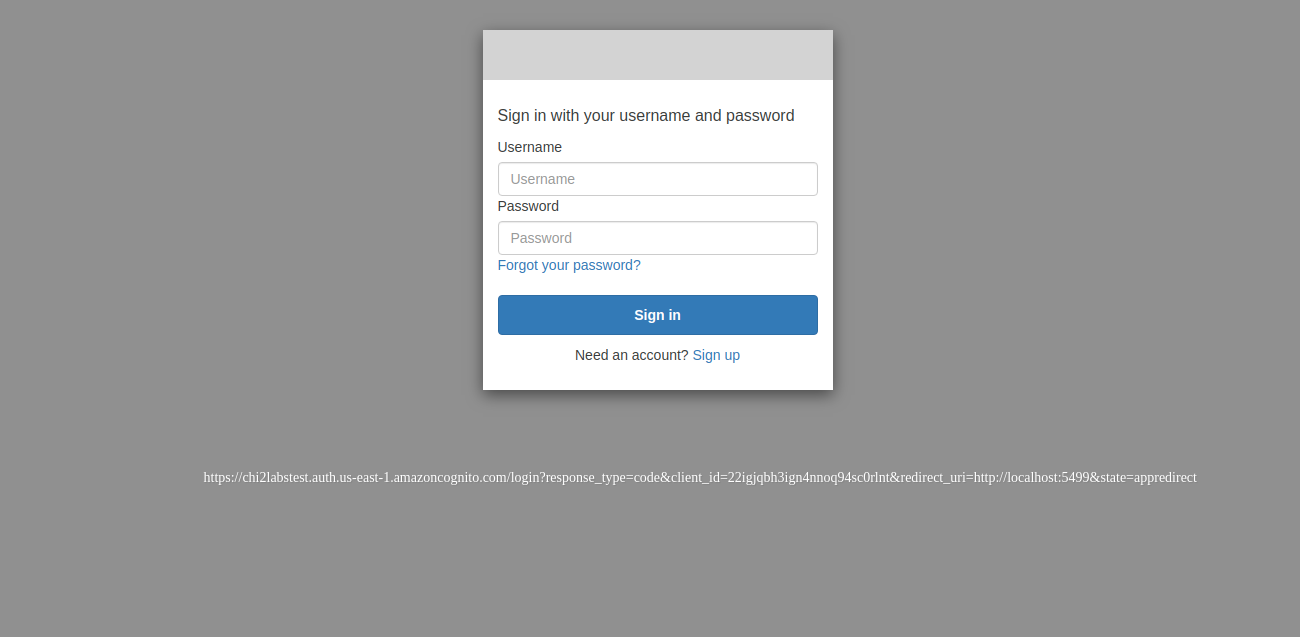
Upon successful authentication, you will be redirect to your app:

The example app can be found in inst/examples/simple-login-app.R.
This app work with a config.yml configured to work with a Cognito instance of Chi2labs, this instance not allow to create user and is required that you run this shiny app using the port 5000 (because Cognito instance is configured to expect this port).
You can test the application with these credentials: